Tracing Crop Circles for Area Measurement
in Inkscape�
Overview
This guide explains how to use Inkscape to trace crop circles for
accurate area measurements, convert them to percentages, and
visualize the results.
Steps:
-
Import Image:
- Open Inkscape and import the top-down picture of the
crop circle.
-
Create Circles:
- Use the Circle Tool to
draw circles that match the rounded parts of the crop
circle.
-
Trace the Border:
- Use the Pen Tool to
trace the outline of the crop circle's border.
-
Smooth the Lines:
- Adjust and smooth the pen lines using the Node
Tool by bending and refining the nodes.
-
Trim Excess Lines:
- Select the desired lines and use the Cut
Path command to trim any excess lines,
maintaining the integrity of the outline.
-
Fill the Outline:
- Fill the outline with a color by following these steps:
- Select the Node Tool and
highlight the traced outline within a rectangle.
- Duplicate the outline using CTRL+D.
- Combine the duplicated outline with CTRL+K.
- Uncheck Stroke and
check Fill.
- Click Join Selected Nodes on
the top-left toolbar.
-
Apply Color A:
- Choose and apply Color A to
the filled outline.
-
Apply Color B:
- Fill the area with Color B by
repeating the steps used for Color A.
- Note: Circles drawn with the Circle Tool do not measure
area until they are split with a line using the Cut
Path command and then combined with CTRL+K.
- Ensure circles are cut through before filling them with Color
B.
-
Unify Color B:
- Combine any separate segments of Color B into
one unified area.
-
Calculate Total Area:
- Duplicate the filled Color A to
represent the total area.
- Duplicate Color B as
well.
- Select both Color A and B, then use the Difference
Tool to find the difference between the
two.
- Note: The duplicated Color B will disappear after
this operation, so make sure Color A is layered below
Color B.
-
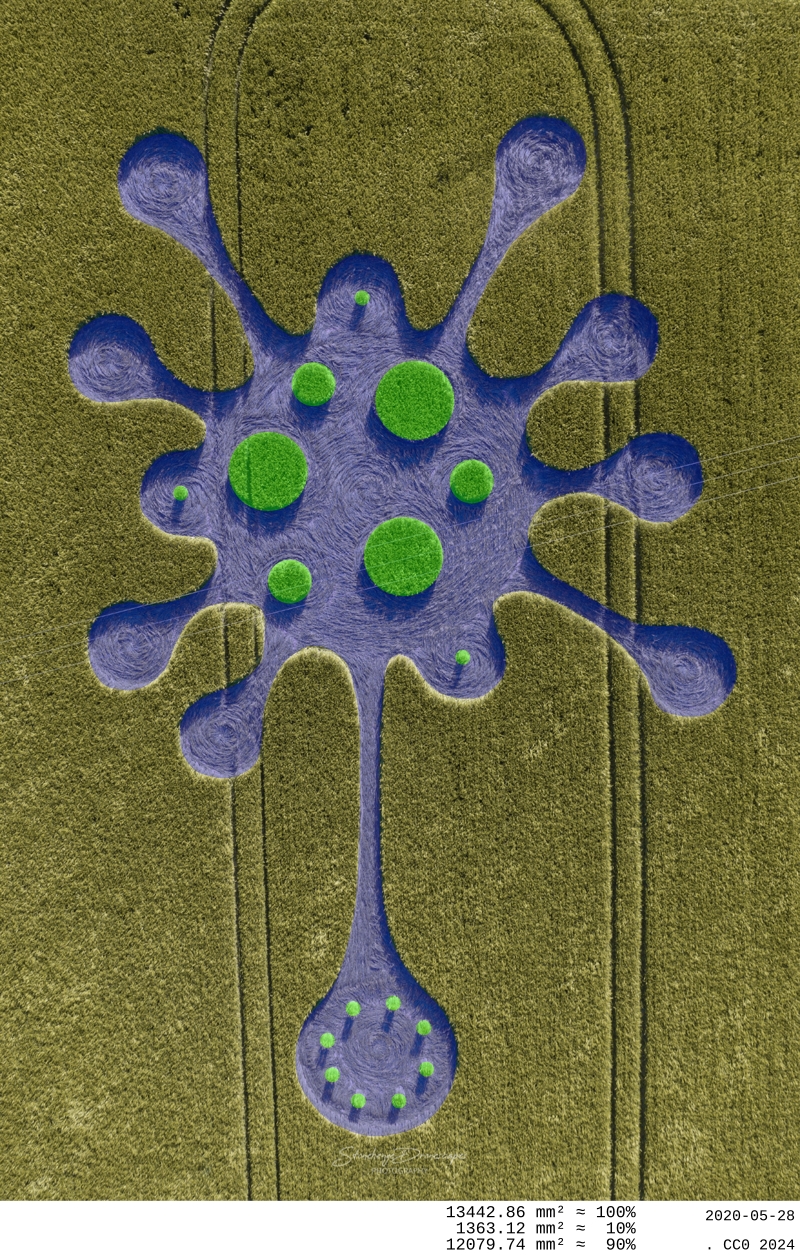
Measure Area with Inkscape:
- Go to Extensions → Visualize
Path → Measure Path... to
measure the areas of Color A and Color B.
- Calculate the percentage of each area.
- In this case, the area was approximately 90% for
Color A and 10% for Color B. Could it be a hidden
message of 9 1 1? 90,
10, 100 without zeros?
-
Final Notes:
- Ensure that each step is done carefully to
maintain the accuracy of measurements.
- The procedure allows you to calculate area percentages
regardless of the original scale of the image.
- Preliminary area measurements provide verification support
for the results of crop circle calculations.
Love and
Light!
Meditate,
Rev. Daniel Elis Axelrod, interfaith
minister of spiritual healing. Practicing reiki from
year 2017 until 2020.
|